Securing a Home Network with Pi-hole, Unbound and Tailscale
Turn a Raspberry Pi into a whole-house ad, tracker and malware blocker with its own recursive DNS resolver, and keep the protection on your phone and laptop away from home with Tailscale.
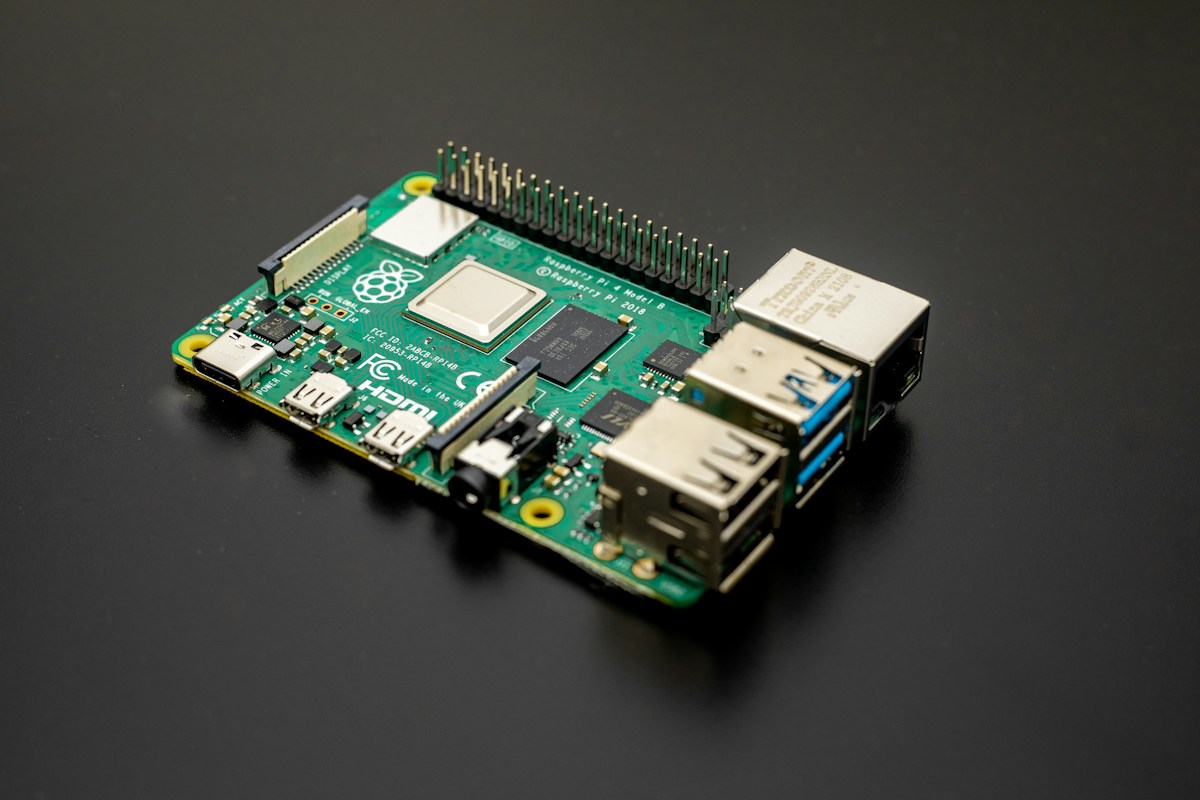
Securing a Home Network with Pi-hole, Unbound and Tailscale
Every device in a house asks a DNS server where to go before it loads anything: phones, laptops, the TV, the smart meter, the cheap ESP32 board in a drawer. Whoever answers those questions sees your browsing and decides what resolves. By default that is your ISP.
This guide moves that job onto a Raspberry Pi you control:
- Pi-hole blocks ads, trackers, phishing, scam and malware domains for every device on the network, with no app to install.
- Unbound resolves names itself, straight from the root servers, with DNSSEC validation. No ISP, Google or Cloudflare resolver in the middle.
- Tailscale carries the same filtering to your phone and laptop when you are out, without opening a single port on your router.
- A USB stick holds a bootable clone of the SD card, so a dead card is a two-minute fix.
Table of contents
- How it fits together
- Hardware
- Flash the OS
- Static IP and Ethernet only
- Baseline hardening
- Install Pi-hole
- Add Unbound as the upstream resolver
- Blocklists
- Let Pi-hole hand out addresses (DHCP)
- Close the IPv6 DNS leak
- Take it with you: Tailscale
- HTTPS for the admin page
- Backups
- Troubleshooting
- What I’d improve next
How it fits together
1
2
3
4
5
6
7
Internet ── ISP router (gateway, DHCP OFF for the main LAN)
              ├── every home device (gets its IP and DNS from the Pi)
              ├── guest Wi-Fi (router DHCP still on, isolated, unfiltered)
              └── Raspberry Pi 192.168.1.53 (Ethernet)
                    Pi-hole (DNS :53, DHCP) ──> Unbound 127.0.0.1:5335 ──> root servers
                    Tailscale 100.x.y.z (DNS for your devices away from home, exit node)
                    USB stick = weekly bootable clone of the SD card
The Pi sits beside the router, not between the router and the internet. The ISP router stays the gateway. An inline firewall (second network card, OpenWrt) is more powerful, but it is overkill for one Pi and turns every Pi reboot into an outage for the whole house.
The addresses in this post are examples. Pick a Pi address outside your router’s DHCP pool (here the pool is .64 to .253, so .53 is safe).
Hardware
- Raspberry Pi 4 or 5. 2 GB of RAM is plenty for this job.
- Official power supply. Under-powered Pis corrupt SD cards.
- microSD card, 16 GB or more.
- Ethernet cable to a free LAN port on the router.
- USB stick, at least as big as the SD card, for the backup clone.
Flash the OS
Use Raspberry Pi Imager and choose Raspberry Pi OS Lite (64-bit). Before writing, open the customisation settings:
- Hostname: pick one and write it down. You will SSH to
<hostname>.local, notpihole.local. I lost ten minutes on that. - User: your own username, not
pi. - SSH: enabled, public key only. Paste the key from
~/.ssh/id_ed25519.pub. - Raspberry Pi Connect: off. This box should not phone home to anything you don’t need.
If you are reusing hardware, expect REMOTE HOST IDENTIFICATION HAS CHANGED on first connect. That is the old host key; clear it with ssh-keygen -R <ip-or-hostname>, and only do that when you know you reflashed the card.
Static IP and Ethernet only
DNS for the whole house should not ride on Wi-Fi. Set a static address on Ethernet with NetworkManager. Point the Pi’s own DNS at the router for now: setting it to 127.0.0.1 before Pi-hole exists breaks the Pi-hole installer.
1
2
3
4
5
6
7
nmcli con show                       # find the Ethernet profile name (often netplan-eth0)
sudo nmcli con mod netplan-eth0 \
  ipv4.method manual \
  ipv4.addresses 192.168.1.53/24 \
  ipv4.gateway 192.168.1.1 \
  ipv4.dns 192.168.1.1
sudo nmcli con up netplan-eth0
Then turn the radios off so the Pi has exactly one path to the network. A Pi with both Ethernet and Wi-Fi on the same subnet picks an interface per connection, and I have watched that cause DNS timeouts under load on an older build.
1
2
3
echo "dtoverlay=disable-wifi" | sudo tee -a /boot/firmware/config.txt
echo "dtoverlay=disable-bt"   | sudo tee -a /boot/firmware/config.txt
sudo reboot
Baseline hardening
1
2
3
sudo apt update && sudo apt full-upgrade -y
sudo apt install -y unattended-upgrades ufw
sudo dpkg-reconfigure -plow unattended-upgrades   # automatic security patches
Firewall: deny everything inbound, then open only what the LAN needs.
1
2
3
4
5
6
7
8
sudo ufw default deny incoming
sudo ufw default allow outgoing
sudo ufw allow from 192.168.1.0/24 to any port 22 proto tcp     # SSH
sudo ufw allow from 192.168.1.0/24 to any port 53               # DNS
sudo ufw allow from 192.168.1.0/24 to any port 80,443 proto tcp # admin page
sudo ufw allow from 192.168.1.0/24 to any port 5353 proto udp   # mDNS, so <hostname>.local works
sudo ufw allow 67/udp                                           # DHCP, see below
sudo ufw enable
Two rules are easy to get wrong:
- DHCP (67/udp) must be allowed from anywhere. A device asking for an address doesn’t have one yet, so its request comes from
0.0.0.0. Afrom 192.168.1.0/24rule never matches it. - mDNS (5353/udp) is what makes
<hostname>.localresolve. Without it you are typing the IP forever.
Install Pi-hole
1
curl -sSL https://install.pi-hole.net | bash
Accept the defaults; any upstream is fine for now, because Unbound replaces it in the next step. Set the admin password afterwards:
1
sudo pihole setpassword
Pi-hole v6 keeps its settings in /etc/pihole/pihole.toml. Read or change any key with sudo pihole-FTL --config <key> [value] instead of editing the file by hand.
Now that Pi-hole answers, point the Pi at itself:
1
2
sudo nmcli con mod netplan-eth0 ipv4.dns 127.0.0.1
sudo nmcli con up netplan-eth0
Add Unbound as the upstream resolver
Pi-hole only filters. Something still has to resolve the names it lets through. Unbound does that locally, asking the root servers, then the .com servers, then the domain’s own servers, and checking DNSSEC signatures along the way.
1
sudo apt install -y unbound
Gotcha: right after install, Unbound starts with its default config on port 53, collides with Pi-hole, fails a few times, and systemd rate-limits it (Start request repeated too quickly). A plain restart is refused. Write the config first, then clear the failure state.
Create /etc/unbound/unbound.conf.d/pi-hole.conf (this is the recipe from the Pi-hole docs, trimmed):
1
2
3
4
5
6
7
8
9
10
11
12
13
14
15
16
17
18
19
20
21
22
23
24
server:
    verbosity: 0
    interface: 127.0.0.1
    port: 5335
    do-ip4: yes
    do-udp: yes
    do-tcp: yes
    do-ip6: no
    prefer-ip6: no

    harden-glue: yes
    harden-dnssec-stripped: yes
    use-caps-for-id: no
    edns-buffer-size: 1232
    prefetch: yes
    num-threads: 1
    so-rcvbuf: 1m

    private-address: 192.168.0.0/16
    private-address: 169.254.0.0/16
    private-address: 172.16.0.0/12
    private-address: 10.0.0.0/8
    private-address: fd00::/8
    private-address: fe80::/10
1
2
3
4
5
6
7
8
sudo systemctl disable --now unbound-resolvconf.service
sudo systemctl reset-failed unbound
sudo systemctl restart unbound

# Should return an address:
dig example.com @127.0.0.1 -p 5335
# DNSSEC check, should return SERVFAIL (the signature is deliberately broken):
dig fail01.dnssec.works @127.0.0.1 -p 5335
Point Pi-hole at it and drop every other upstream:
1
sudo pihole-FTL --config dns.upstreams '["127.0.0.1#5335"]'
Blocklists
The default StevenBlack list is a good start. I added three from HaGeZi, which Pi-hole v6 reads in their ABP-style adblock/ format:
| List | What it blocks | Rough size |
|---|---|---|
| StevenBlack (default) | ads, trackers | ~70k |
| HaGeZi Pro | ads, trackers, telemetry, with low breakage | ~200k |
| HaGeZi Threat Intelligence Feeds | malware, phishing, scams, command and control | ~2M |
| HaGeZi Fake | fake shops and scam sites | ~17k |
Add them under Lists in the admin page:
1
2
3
https://cdn.jsdelivr.net/gh/hagezi/dns-blocklists@latest/adblock/pro.txt
https://cdn.jsdelivr.net/gh/hagezi/dns-blocklists@latest/adblock/tif.txt
https://cdn.jsdelivr.net/gh/hagezi/dns-blocklists@latest/adblock/fake.txt
Gotcha: a list added in the UI shows a grey question mark and blocks nothing until gravity runs. One of my lists sat unloaded for a day before I noticed. Run it right away:
1
sudo pihole -g
After that, Pi-hole’s own weekly cron refreshes the lists. Don’t edit /etc/cron.d/pihole; pihole -up rewrites it.
You will also see red _dns.resolver.arpa rows in the Query Log. That is expected: Pi-hole blocks the lookup Apple and Android use to discover encrypted DNS, which would otherwise let devices quietly route around it.
Let Pi-hole hand out addresses (DHCP)
The usual setup is to tell the router’s DHCP server to hand out the Pi as the DNS server. My ISP’s router shows those DNS fields but locks them. If yours does too, the way through is to move DHCP to the Pi.
- Note the router’s current DHCP range, lease time and gateway.
Configure Pi-hole’s DHCP with the same values, but leave it off:
1
2
3
4
5
sudo pihole-FTL --config dhcp.start 192.168.1.64
sudo pihole-FTL --config dhcp.end 192.168.1.253
sudo pihole-FTL --config dhcp.router 192.168.1.1
sudo pihole-FTL --config dhcp.netmask 255.255.255.0
sudo pihole-FTL --config dhcp.leaseTime 24h
- Turn the router’s DHCP off for the main network.
Immediately turn Pi-hole’s on:
1
sudo pihole-FTL --config dhcp.active true
- Toggle Wi-Fi on a phone. It should appear under Settings > DHCP in the admin page and start showing up in the Query Log.
I left the guest network on the router’s own DHCP. Guests and IoT gadgets stay isolated from the main LAN and simply don’t get filtering.
The trade-off, and the escape hatch
The Pi now hands out every IP address in the house. If it dies, devices can’t join the network. Write the rollback down somewhere a non-technical person in the house can find it:
- Open the router’s admin page, turn DHCP back on for the main network, save.
- Turn Wi-Fi off and on on each device so it picks up a lease from the router.
- If the Pi is still alive, stop its DHCP so two servers don’t fight:
sudo pihole-FTL --config dhcp.active false.
That takes about a minute and gets you back to plain, unfiltered internet. Label the Pi “Don’t unplug: home internet” while you are at it.
Close the IPv6 DNS leak
After everything above, ads still showed up on my laptop now and then. The reason: the ISP router advertises IPv6 and offers itself as an IPv6 DNS server, and there is no setting to turn that off. Devices happily use it and skip Pi-hole.
Check on a Mac:
1
scutil --dns | grep nameserver
If an IPv6 address you don’t recognise is near the top, you are leaking. Options, from best to worst:
- Run Tailscale on the device with the DNS override described below. It becomes resolver #1 and forwards to the Pi. This fixed it on my own devices.
- Turn IPv6 off per device:
networksetup -setv6off Wi-Fi(undo withnetworksetup -setv6automatic Wi-Fi). - Put your own router behind the ISP’s. The real fix, and the most work.
Also check the other common bypasses: browser “Secure DNS” (DNS over HTTPS) in Chrome and Firefox, and iCloud Private Relay.
Take it with you: Tailscale
I chose Tailscale over a self-hosted WireGuard or PiVPN setup because it needs no port forwarding, works behind carrier-grade NAT, and my devices were already on it.
1
2
3
4
5
6
7
8
9
curl -fsSL https://tailscale.com/install.sh | sh

# Allow the Pi to forward traffic, needed for the exit node:
echo 'net.ipv4.ip_forward = 1' | sudo tee /etc/sysctl.d/99-tailscale.conf
echo 'net.ipv6.conf.all.forwarding = 1' | sudo tee -a /etc/sysctl.d/99-tailscale.conf
sudo sysctl -p /etc/sysctl.d/99-tailscale.conf

# Don't let Tailscale rewrite the Pi's own DNS; advertise it as an exit node:
sudo tailscale up --accept-dns=false --advertise-exit-node
Pi-hole must answer on the Tailscale interface, and ufw must let it in:
1
2
3
sudo pihole-FTL --config dns.listeningMode ALL   # ufw keeps the internet out
sudo ufw allow in on tailscale0
sudo ufw route allow in on tailscale0 out on eth0  # exit node traffic
In the Tailscale admin console:
- Machines > (your Pi) > Edit route settings: approve Use as exit node, and disable key expiry for this machine.
- DNS: add the Pi’s Tailscale IP as a global nameserver and turn on Override DNS servers.
Now every device running Tailscale resolves through the Pi, at home or on hotel Wi-Fi. Test it from a laptop: dig doubleclick.net @100.x.y.z should return 0.0.0.0.
Two policy gotchas
If your tailnet has custom access rules (mine did, because of a tagged server), the defaults stop applying:
Tagged devices lose DNS. A tailnet-wide DNS override applies to every device that accepts DNS, including tagged servers. If the policy doesn’t let them reach the Pi on port 53, every lookup on those boxes times out. Add a grant:
1
{"src": ["tag:server"], "dst": ["<pi-tailscale-ip>"], "ip": ["udp:53", "tcp:53"]}
The exit node doesn’t show up on clients, even though the console shows the badge. Members need permission to use the internet through it:
1
{"src": ["autogroup:member"], "dst": ["autogroup:internet"], "ip": ["*"]}
On a phone, the control you want is Exit Node > (your Pi). “Run as Exit Node” makes the phone itself an exit node; ignore it.
HTTPS for the admin page
Out of the box, the admin page serves a self-signed certificate, and the backup page warns that exports travel in plain text. Tailscale can issue a real Let’s Encrypt certificate for the Pi’s tailnet name. Enable HTTPS Certificates in the console’s DNS page, then:
1
2
3
4
5
6
7
8
9
10
11
12
sudo tailscale cert \
  --cert-file /etc/pihole/ts.crt \
  --key-file /etc/pihole/ts.key \
  <pi-name>.<your-tailnet>.ts.net
sudo sh -c 'cat /etc/pihole/ts.key /etc/pihole/ts.crt > /etc/pihole/tls-tailscale.pem'
sudo chown pihole:pihole /etc/pihole/tls-tailscale.pem
sudo chmod 600 /etc/pihole/tls-tailscale.pem

sudo pihole-FTL --config webserver.tls.cert /etc/pihole/tls-tailscale.pem
sudo pihole-FTL --config webserver.domain <pi-name>.<your-tailnet>.ts.net
sudo pihole-FTL --config webserver.port '80r,443s'   # r = redirect to HTTPS, s = TLS
sudo systemctl restart pihole-FTL
The certificate lasts 90 days. I wrapped those commands in a small script that only restarts Pi-hole when the certificate actually changed, and run it monthly from /etc/cron.d.
Backups
Two layers.
1. A bootable clone of the whole SD card with rpi-clone. If the card dies, pull it out and power on: the Pi 5 tries the SD card first, then USB, so it boots straight from the stick.
1
2
3
curl https://raw.githubusercontent.com/geerlingguy/rpi-clone/master/install | sudo bash
sudo systemd-run --unit=rpi-clone /usr/local/sbin/rpi-clone -u sda
journalctl -u rpi-clone   # look for "Done with clone to /dev/sda"
Run manual clones through systemd-run. If you run it in a plain SSH session and the connection drops, you never learn whether it finished. For the weekly cron, pipe it into the journal so failures are visible:
1
2
# /etc/cron.d/rpi-clone
0 4 * * 0 root /usr/bin/systemd-cat -t rpi-clone /usr/local/sbin/rpi-clone -u sda
2. Pi-hole’s own export (Teleporter): settings, lists, allow/deny entries and DHCP leases in one zip. Create one weekly and copy it off the Pi:
1
2
# /etc/cron.d/pihole-teleporter
30 3 * * 0 root cd /var/backups/pihole && /usr/bin/pihole-FTL --teleporter && find /var/backups/pihole -name '*.zip' -mtime +28 -delete
Restore from Settings > Teleporter > Import, or sudo pihole-FTL --teleporter <file.zip>. Treat the zip as sensitive: it contains the admin password hash.
Troubleshooting
| Symptom | First thing to check |
|---|---|
| Whole house has no internet | Do the rollback first, debug later. Then ping the Pi, systemctl status pihole-FTL unbound, vcgencmd get_throttled (0x0 means no power or heat problem). |
| Pi is up but pages don’t load | dig example.com @127.0.0.1 -p 5335 on the Pi. If it fails, Unbound is down: sudo systemctl restart unbound. |
| One website is broken | Query Log, filter by the device’s IP, find the red row, click Allow. Or pihole allow <domain>. pihole disable 5m for a quick test. |
| A device gets no IP address | sudo pihole-FTL --config dhcp.active is true, and sudo ufw status shows 67/udp ALLOW Anywhere. |
| Ads on a device at home | The IPv6 leak above, or browser DNS over HTTPS. |
| No blocking away from home | Tailscale connected? Override DNS on? dns.listeningMode is ALL? |
What I’d improve next
- A small UPS for the router and the Pi. A sudden power cut is the most likely way to corrupt the SD card.
- A second Pi-hole so DNS and DHCP survive one box going down.
- Move IoT gadgets to the guest network. A smart meter and a hobby board have no business on the same LAN as my laptop.
- Harden the router itself: new admin password, WPS, UPnP and remote admin off, WPA3 where the devices support it.
Maintenance after that is close to zero: security patches install themselves, the blocklists refresh weekly, and pihole -up once a month keeps Pi-hole current.